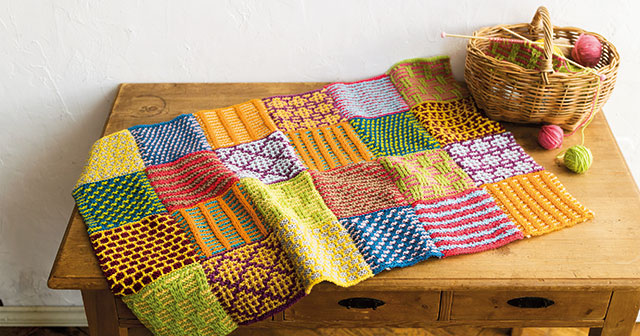
寒い季節の手づくりといえば、やっぱり編み物ですよね。編み物には棒針編みやかぎ針編みなどの種類がありますが、今回は2本の針で編む「棒針編み」をご紹介します。
目次
◇棒針編みとは?
編み物の代表的な手法のひとつで、2本または複数本の棒状の針を使って編みます。「表編み」と「裏編み」という2種類の編み方をマスターすれば、簡単なマフラーなどが編めますよ。
◇棒針編みに必要な材料と道具
・糸
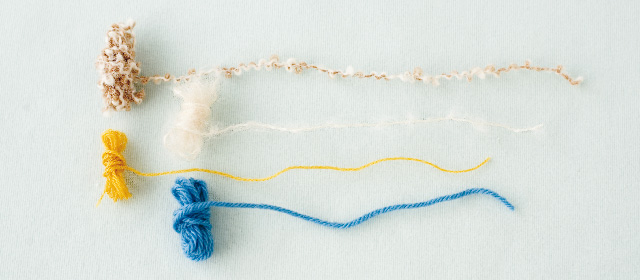
編み物用の糸は素材も太さも種類が豊富。それぞれ、編みやすさや仕上がりサイズ、風合いが異なります。棒針編み初心者の方は並太〜極太のストレート糸から始めるのがオススメです!
・ 編み針
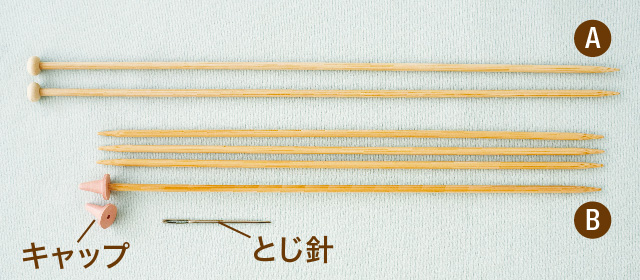
選んだ糸に合わせて針を選びます。毛糸についている帯に、目安となる編み針の号数が表示されているので参考にしましょう! マフラーなど平面のものを編む場合には片側にストッパーの役目をする玉のついた針を2本使います(A)。また、今回は使用しませんが、帽子などを筒状に編む場合には両側が細くなった編み針を4~5本使います(B)。8号の棒針を使用しました。
・とじ針
できあがった編み地をとじ合わせる時に使用します。針穴が大きく、先が丸い針です。
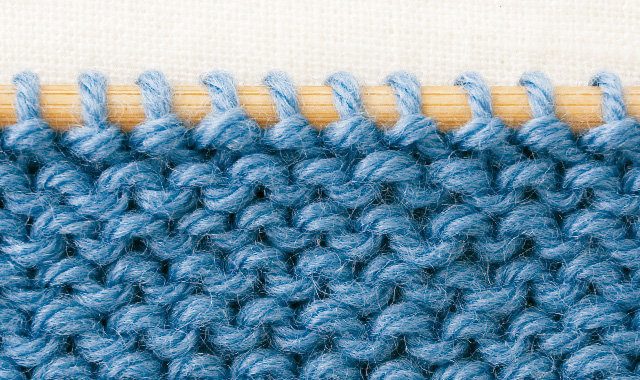
◇表編みと裏編み
棒針編みの基本的な編み方は「表編み」と「裏編み」の2種類です。メリヤス編みはこの2種類の編み方を交互に繰り返します。偶数段は編み地の裏側を見ながら「裏編み」をし、奇数段は編み地の表側を見ながら「表編み」をすると覚えましょう。編み地の表と裏は写真のように編み目になります。
・メリヤス編みの表側
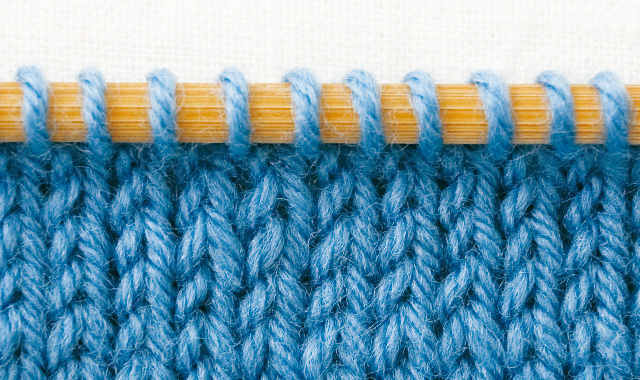
・メリヤス編みの裏側
◇針と糸の持ち方
針と糸の持ち方には「フランス式」と「アメリカ式」があるのをご存知でしょうか。どちらも編み方は同じなのですが、糸を持つ手(持ち方)が違います。両方試してみて、編みやすい方で編んでくださいね。
【フランス式】
左手の指に糸をかけて、作り目をした針を持ちます。
【アメリカ式】
作り目に針を入れ、右手の指に糸をかけて針を持ちます。
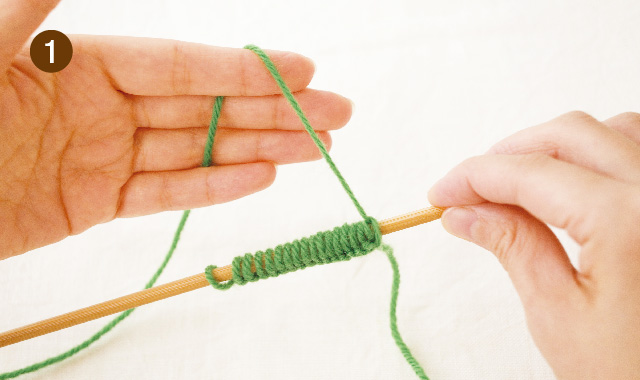
◇まず、作り目をします
「作り目」とは棒針編みをする時の最初の1段です。今回は「指でかける方法」をご紹介します。
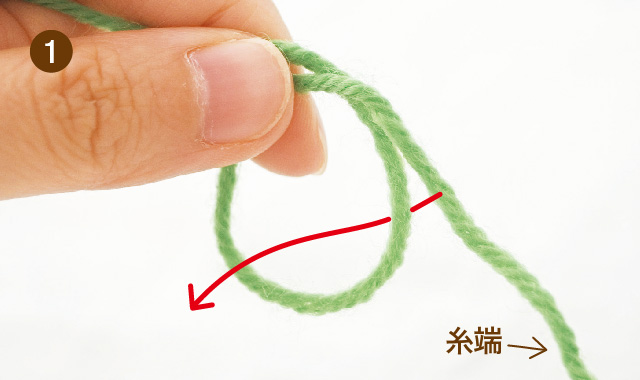
作りたい編み地の幅の約3.5倍の長さのところに「わ」を作ります。
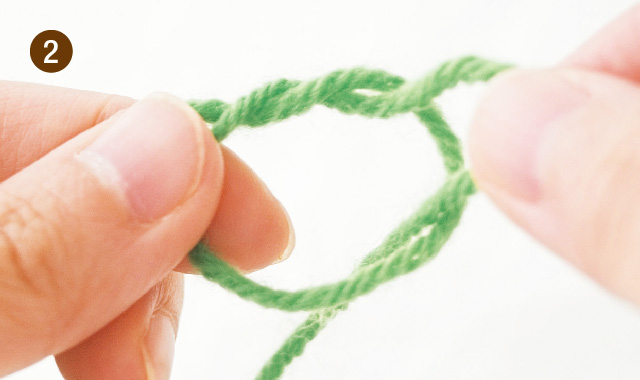
「わ」から糸を引き抜きます。
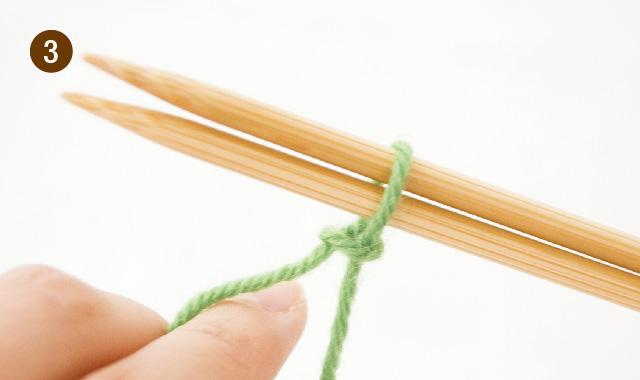
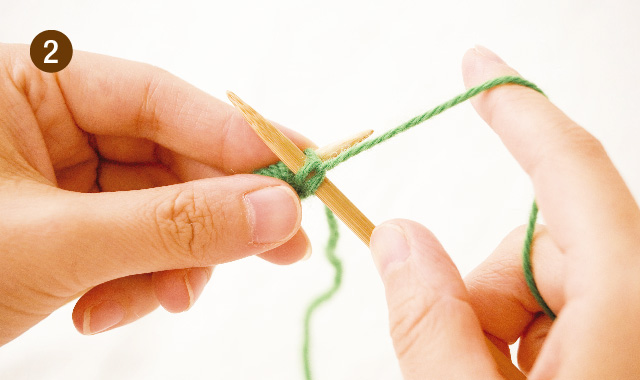
できた「わ」に針を2本通して、「わ」を引き締めます。(これが1目めになります)
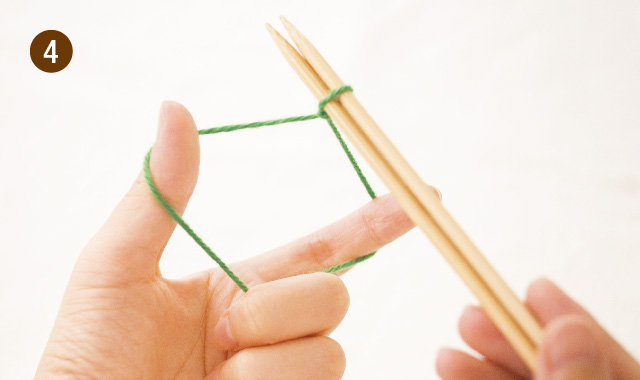
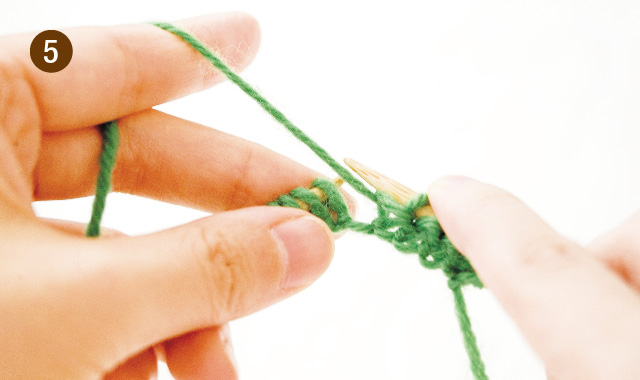
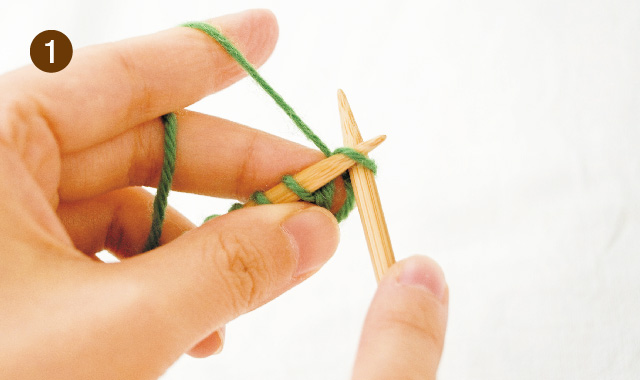
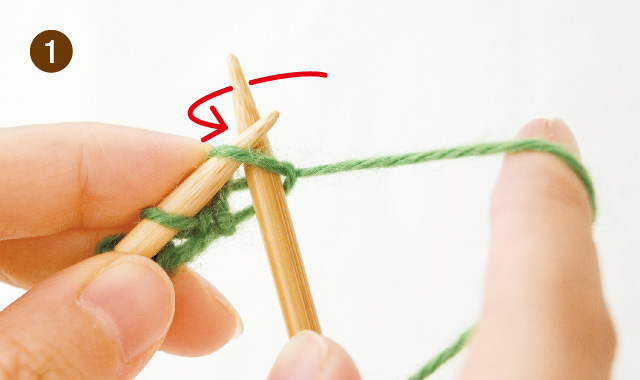
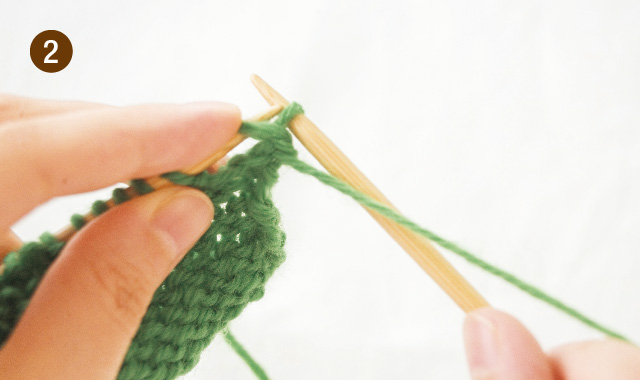
棒針2本を右手に持ち、短い方の糸を左手の親指、長い方を人さし指にかけ、残りの3本の指で2本の糸を握ります。
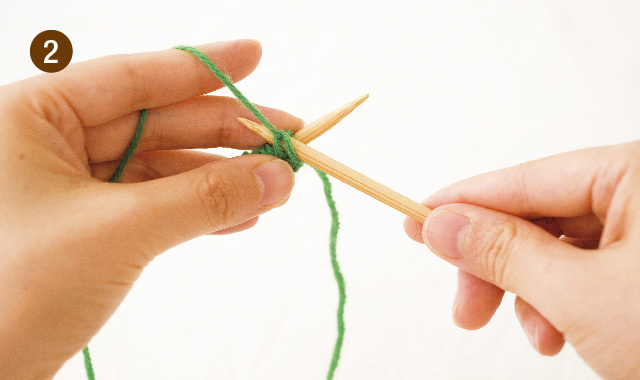
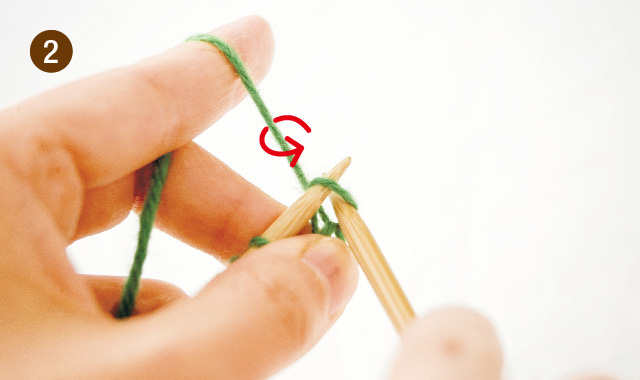
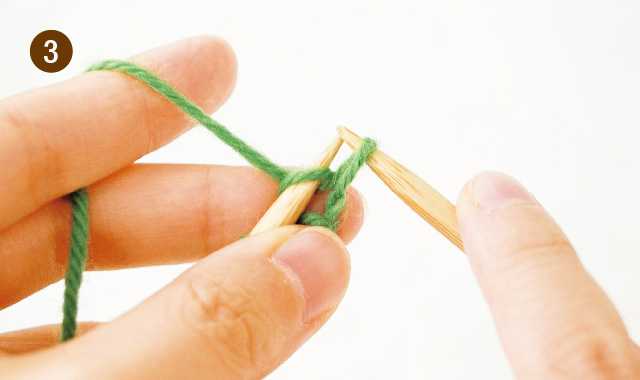
親指の糸を矢印の方向にすくいます。
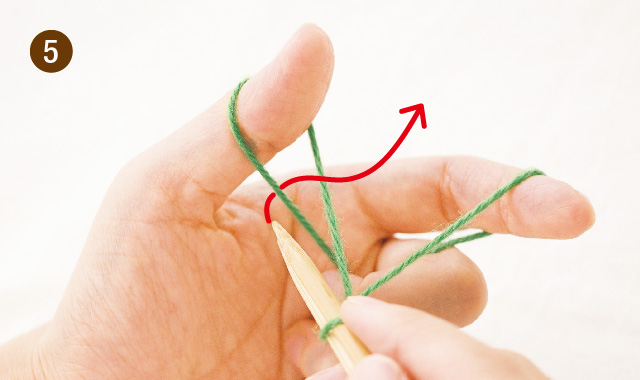
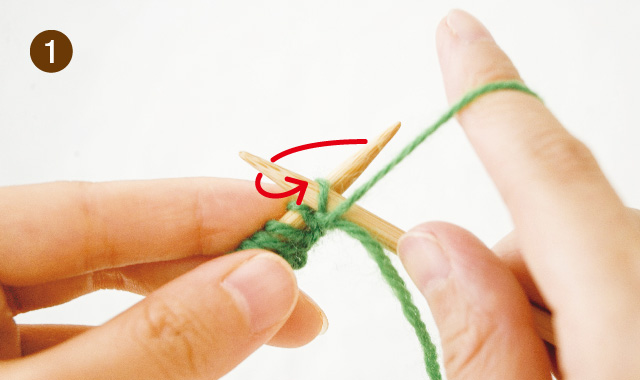
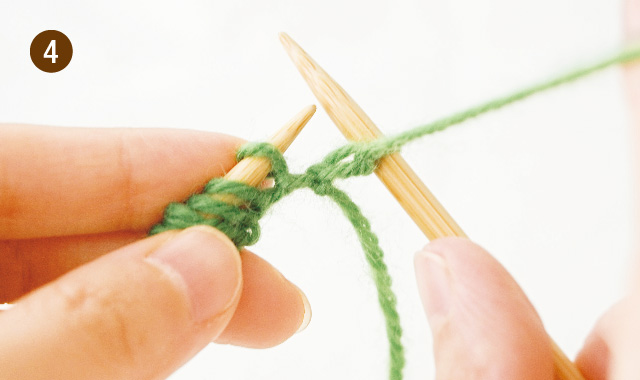
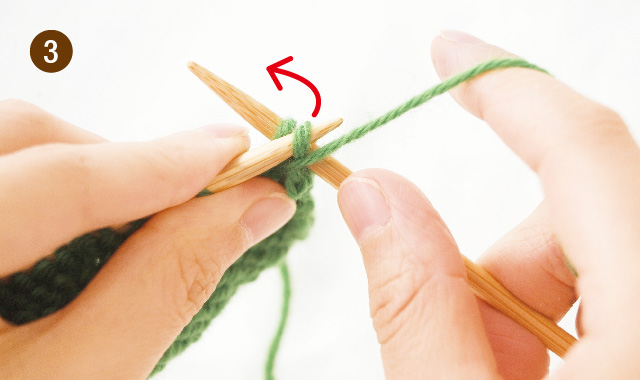
さらに人さし指の糸をすくって、親指の糸の「わ」にくぐらせます。
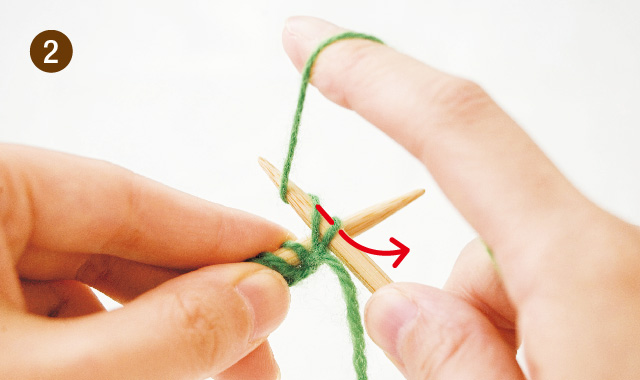
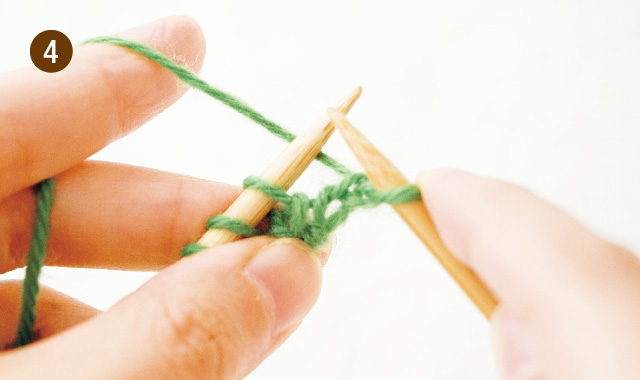
「わ」にくぐらせたところです。次に親指を外します。
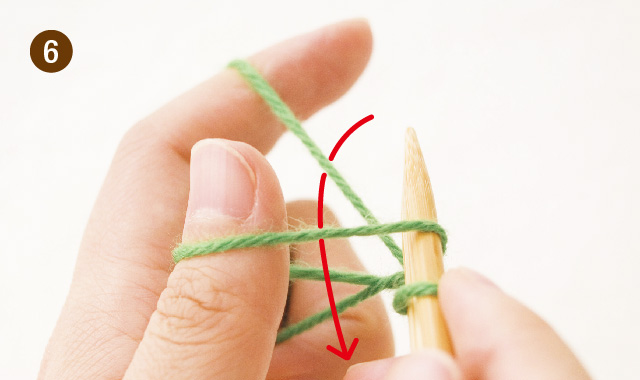
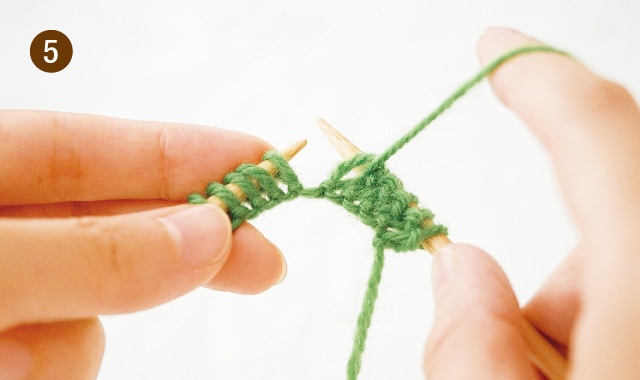
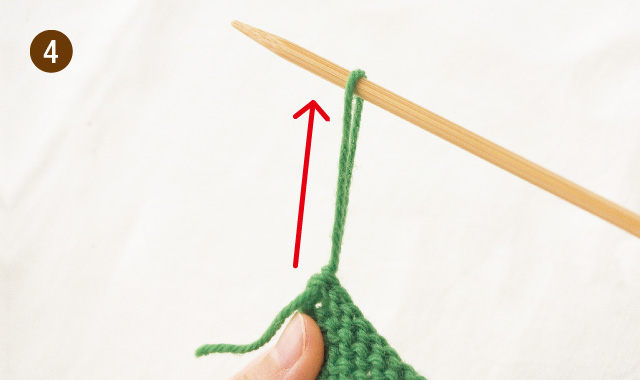
手前の糸を親指にかけて引き締めます。

糸を引き締めながら親指を開くと、⑤の状態に戻ります。

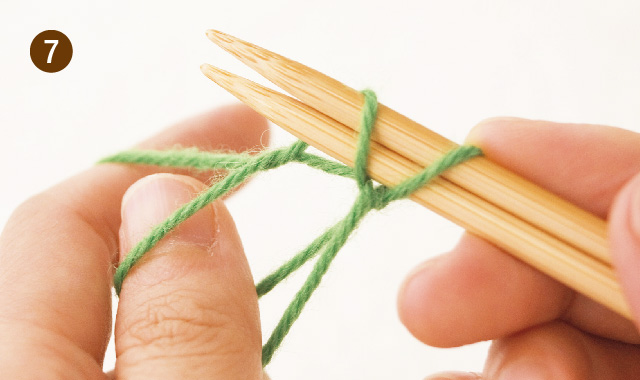
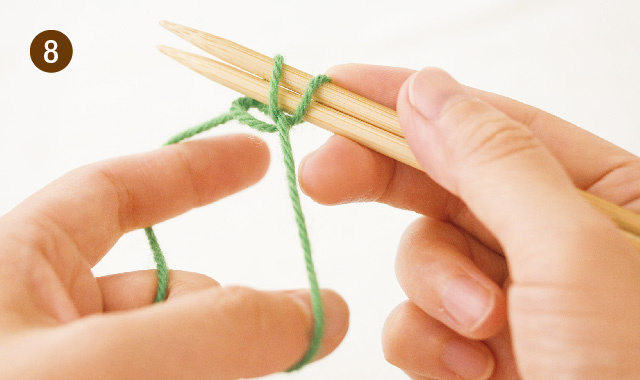
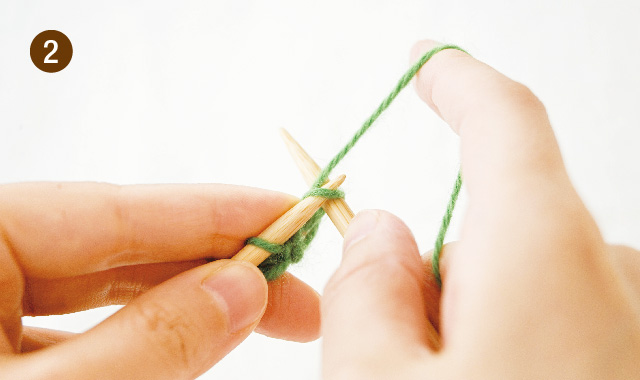
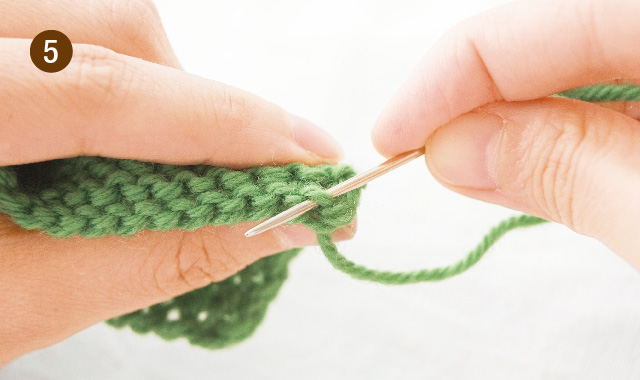
⑤から⑨を繰り返して、必要な目数を作り、針を1本引き抜くと作り目の完成です。
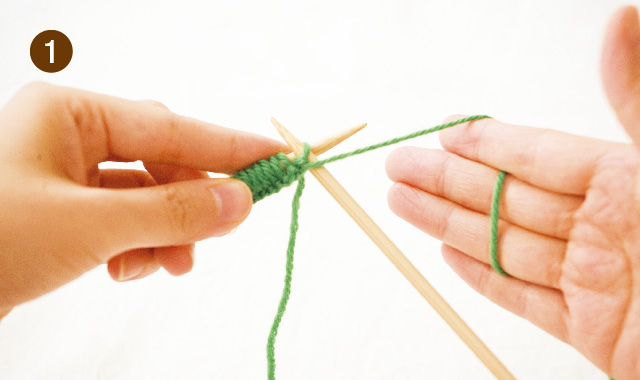
◇2段めを編みます(裏編みをします)
「フランス式」と「アメリカ式」のそれぞれの持ち方でご紹介します。
【フランス式】
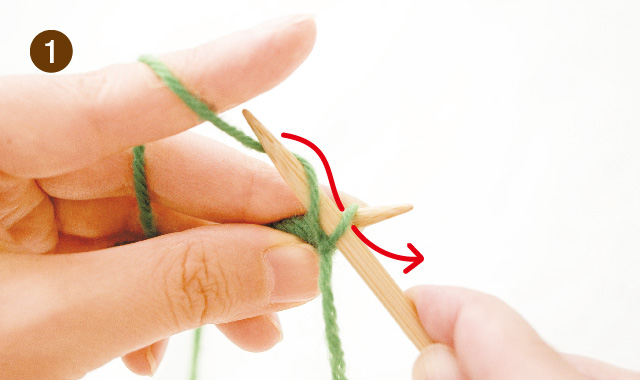
右端の1目に針を右側から入れ、写真のように糸を針に絡ませて引き出します。
絡ませた糸を編み目から引き出したところです。

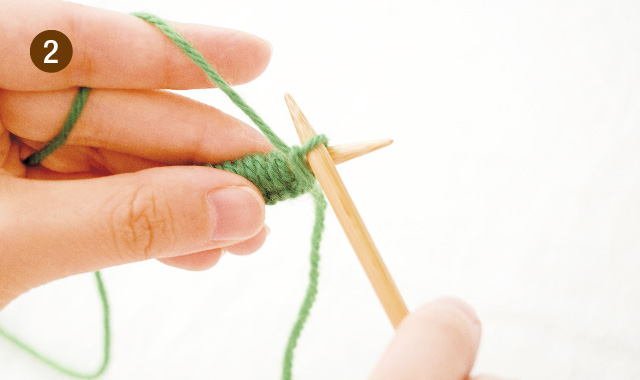
左針の目を外します。
1目編めました。
①〜④を繰り返して端まで編みます。
【アメリカ式】
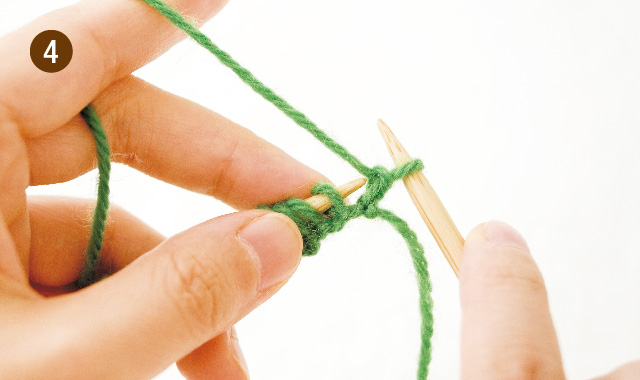
右端の1目に針を右側から入れ、糸を針に引っかけます。
引っかけた糸を編み目から引き出します。
糸を引き出したところです。
左針の目を外します。1目編めました。
①〜④を繰り返して端まで編みます。
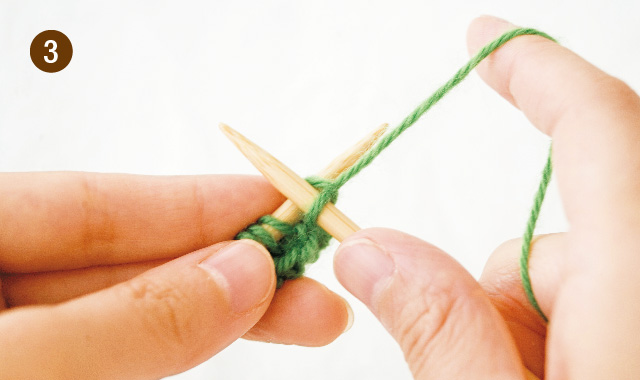
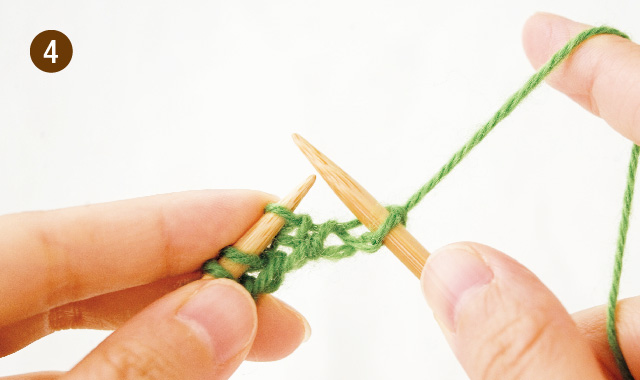
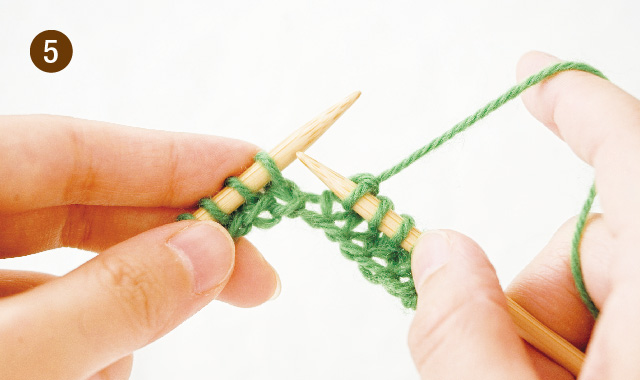
◇3段目を編みます(表編みをします)
編み終えた右針をもう一度左手に持ちかえて表編みをします。
【フランス式】
右端の1目に針を左側から入れます。
編み目を針で少し広げるようにして、糸をすくいます。
すくった糸を編み目から引き出します。
左針の目を外します。1目編めました。

①〜④を繰り返して端まで編みます。
【アメリカ式】
右端の1目に針を左端から入れ、糸を奥から手前に引っかけます。
引っかけた糸を編み目から引き出します。
糸を編み目から引き出したところです。
左針の目を外します。1目編めました。
①〜④を繰り返して端まで編みます。
◇裏編みと表編みを交互に繰り返します
途中で糸がなくなってしまったら、新しい糸で数目編んだ後、2本の糸端を軽く結んでおき、最後にほどいて、とじ針で編み目の間をくぐらせて糸を始末します。
◇伏せ目をして糸を始末します
最後の1段を編みながら1目ずつ編み目を伏せていきます。
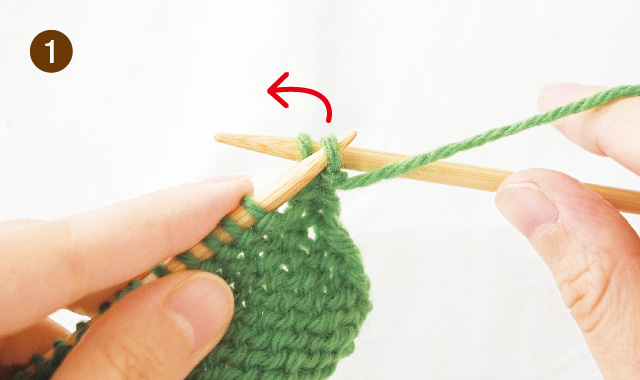
裏編みを2目編み、左の針で右側の1目を左側の編み目にかぶせます。
編み目をかぶせたところです。次の1目を編みます。
右側の編み目を左の編み目にかぶせ、これを繰り返します。
端まで伏せ目をしたら、糸をカットして引き抜きます。
とじ針で編み目の間に糸を数目くぐらせて完成です。
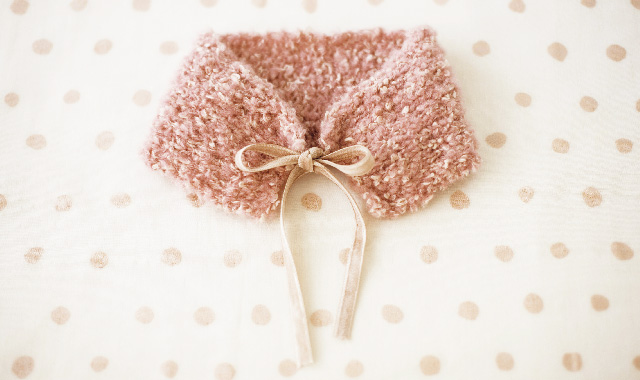
◇メリヤス編みのティペット
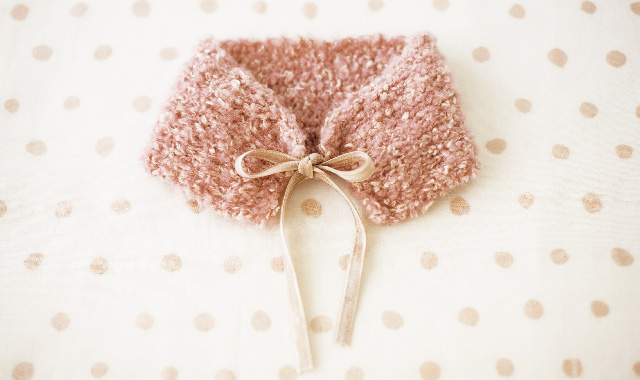
編み方をマスターしたら、短時間で編めるこんなティペットはいかがでしょうか?モヘアやループのある糸なら、編み目の大きさがそろわなくても目立ちませんよ♪
手編みセーターも夢じゃない!
表編みと裏編みを覚えれば、あとはその応用で模様編みもできます。ぜひマスターして、大作にもチャレンジしてみてください!
クチュリエブログでは、編み物はもちろん、裁縫、刺しゅうなど、さまざまな手づくりのコツをお届けしています。小さなコツを覚えて、コツコツ手づくり、楽しみましょう! 手づくりキットを販売しているクチュリエショップや、公式SNSアカウントもお見逃しなく!
本記事で紹介した商品はこちら
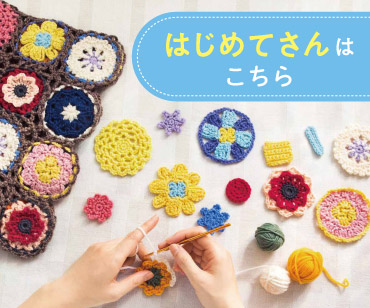
作り目からあこがれ小物まで「はじめてさんのきほんのき」棒針編みレッスンの会
棒針編みはじめてさん向けのやさしいキット。第一関門ともいえる作り目も、詳しく説明しているので安心です。まず練習用のサンプラーでしっかり基礎を身につけてから、本番の小物作りにチャレンジ。簡単なものから順番に届くので自然とレベルアップできます。カラフルかわいい毛糸で編みたい気持ちも上昇!
【月々¥100】「クチュリエクラブ」会員募集
「クチュリエクラブ」の会員になると、手づくり情報満載の会員誌『クチュリエの種』のお届けや、特別キャンペーンのご案内、手づくりイベントへの招待など、特典もいろいろ。
SHARE


関連記事


最近読んだ記事

手芸(ハンドメイド)したくなったら、
クチュリエショップへ


ショッピング

おすすめコンテンツ
手芸・手づくりキット、ハンドメイド雑貨のお買い物はこちら
お買い物
編み物
毎日編みたい 年中編みたい編み物
お買い物
刺しゅう
刺したい刺繍(刺しゅう)がきっとある!

お買い物
刺し子
伝統模様からキャラクターまで人気の刺し子
お買い物
裁縫・ソーイング
裁縫・ソーイングのお悩みやコツが集結
お買い物
アクセサリー
ハンドメイドの手作りアクセサリー
お買い物
クラフト
クラフト 針糸使わないハンドクラフト
お買い物
ミニチュア
小さい かわいい 心ときめくミニチュア

お買い物
初心者キット
できるようになる!人気の初心者キット
お買い物
クチュリエ ショップサイト
お買い物
セール・キャンペーン
お買い物
最新カタログ無料プレゼント!
お買い物