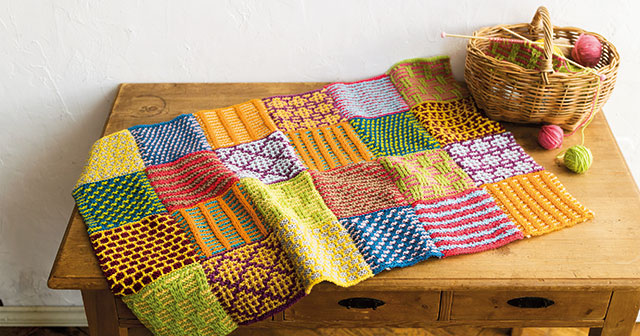
素朴な編み地がかわいい方眼編み。マス目を塗りつぶすように模様が作れるのも楽しいですよ!
目次
方眼編みとは?
かぎ針編みの模様のひとつで、くさり編みと長編みを組合わせ、方眼のマス目のような模様を作り出す編み方です。くさり編み、長編みの手加減がそろうと、より一層きれいに柄が浮き立ちますよ。ドイリーや、ストールなどにも使われる汎用性の高い編み地です。
材料と道具
・糸
毛糸、コットン糸、レース糸など、編みやすい糸であれば何を使ってもかまいません。太い糸、太い針を使うほど大きなマス目ができます。
・かぎ針
糸に合った号数のかぎ針を使います。毛糸でストールを編む場合は、指定の号数よりちょっと太めの針を使って、ざっくりした編み地に仕上げるのもかわいいですよ。
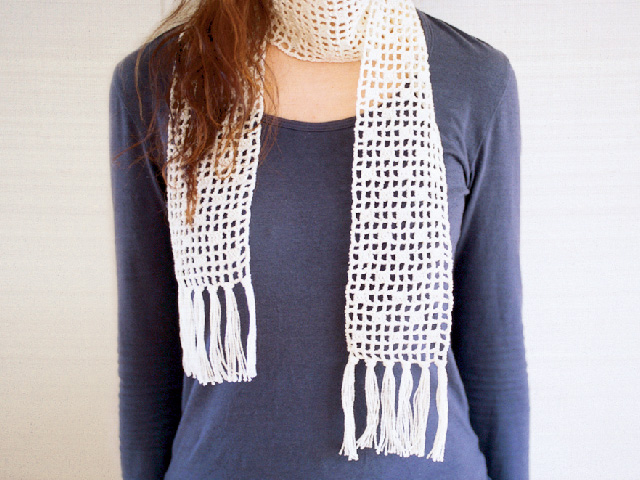
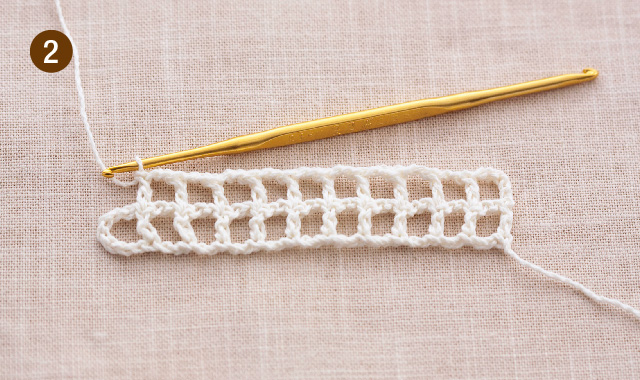
方眼編みで作る、水玉模様のストールの編み方
方眼の編み目に散らばった水玉が素朴でかわいいストールです。
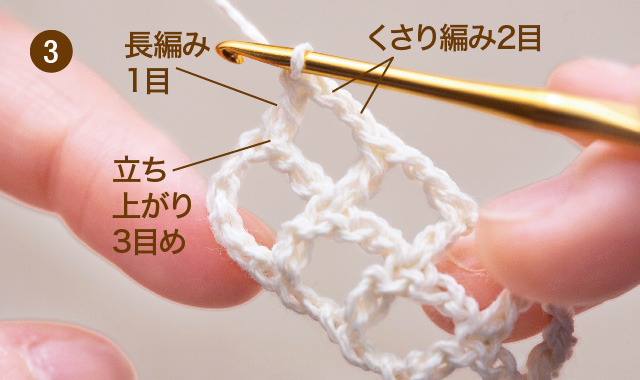
◇作り目・1段め
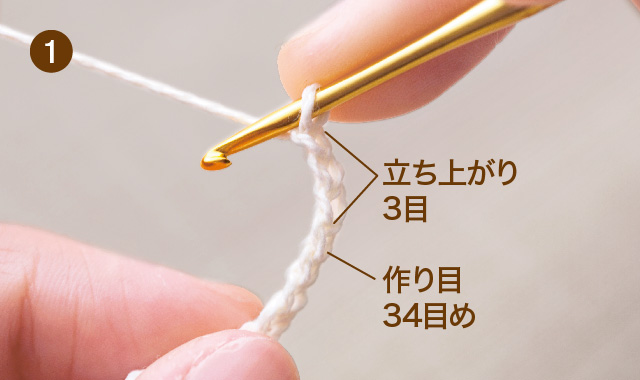
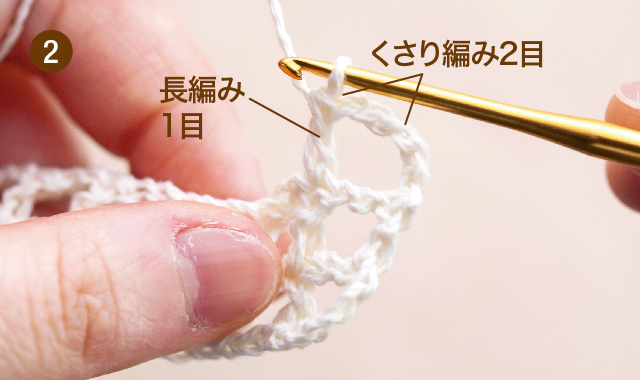
くさり編みを34目編み(作り目)、くさり編み3目で立ち上がります。
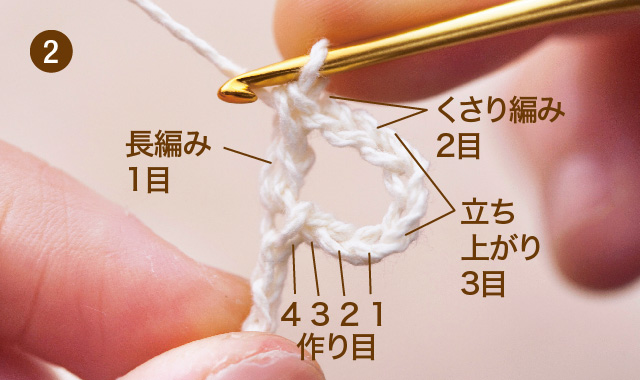
くさり編みを2目編み、作り目のくさり編み4目め(端から9目め)の裏山に長編みを1目編み入れます。
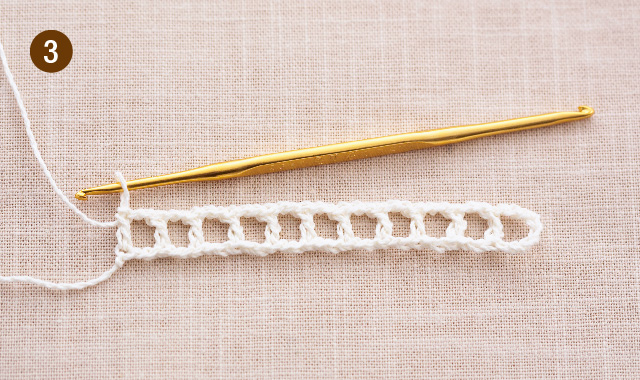
「くさり編みを2目編み、作り目のくさり編み2目をとばした3目めに長編みを1目編み入れる」を10回くり返します。
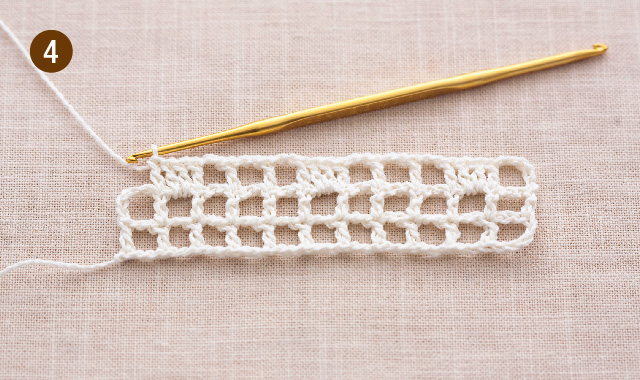
◇2段め
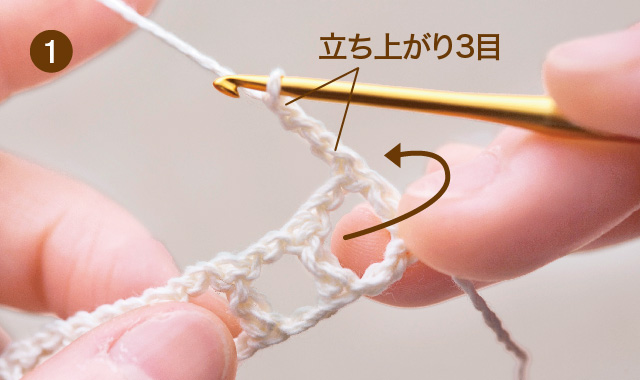
くさり編み3目で立ち上がり、編み地をまわして持ち替えます。
「くさり編みを2目編み、1段めの長編みに長編みを1目編み入れる」を10回くり返します。
くさり編みを2目編み、前段の立ち上がりのくさり編み3目めに長編みを1目編み入れます。
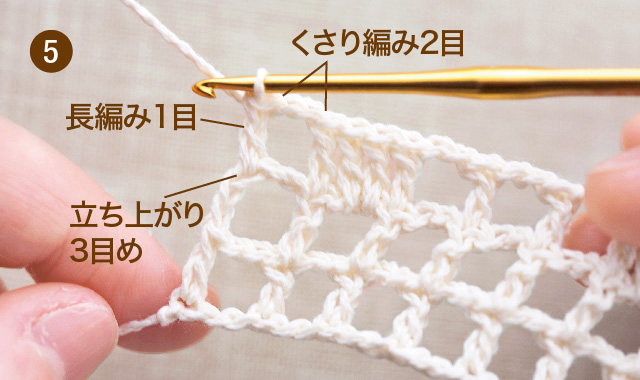
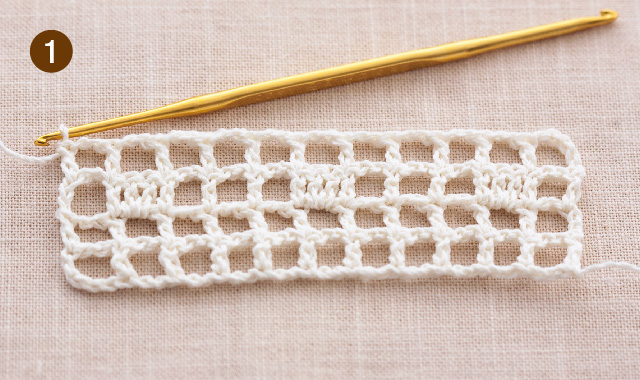
◇3段め
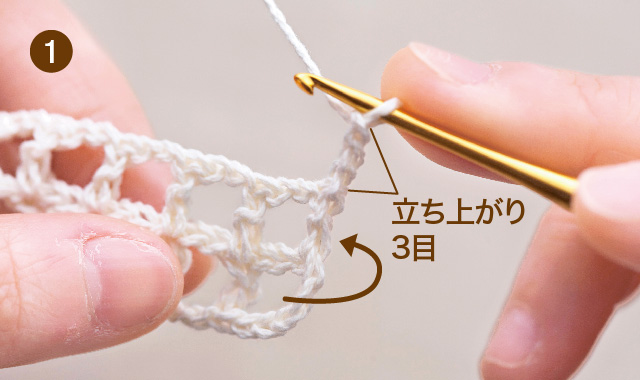
くさり編み3目で立ち上がり、編み地をまわして持ち替えます。
くさり編みを2目編み、前段の長編みに長編みを1目編み入れます。
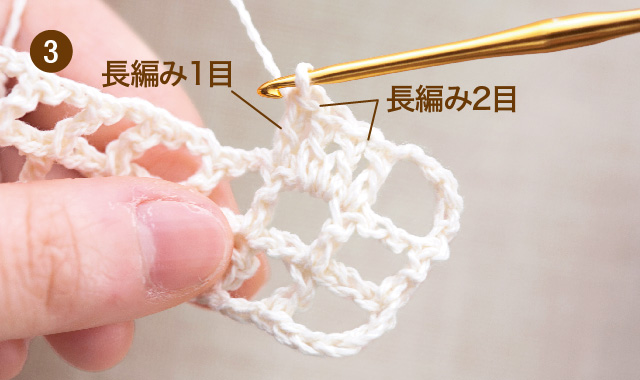
前段のくさり編み全体をすくって長編みを2目編み入れ、前段の長編みに長編みを1目編み入れます。
「②を3回、③を1回」を2回くり返します。
くさり編みを2目編み、前段の立ち上がりのくさり編み3目めに長編みを1目編み入れます。
◇4段め
2段目と同様に編みます。
◇5段め
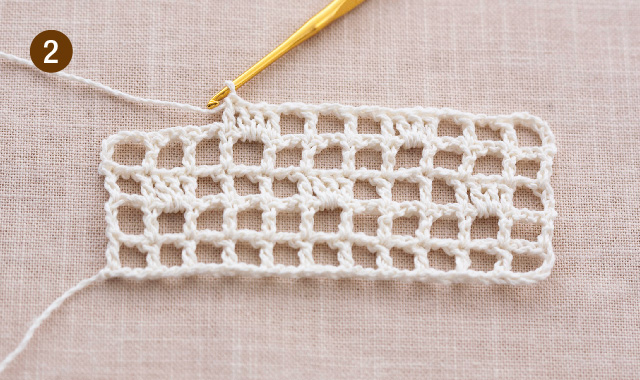
3段めと同様に編み始め、「3段めの②を3回、③を1回」を2回くり返します。
3段めの②を2回くり返し、3段めの⑤を編みます。
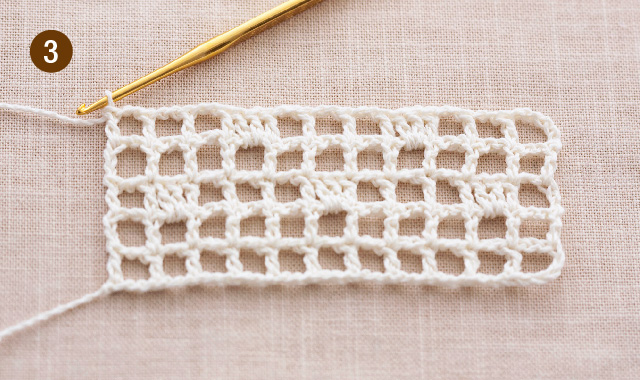
◇6段め以降
2〜5段めをくり返し、お好みの長さまで編みます。
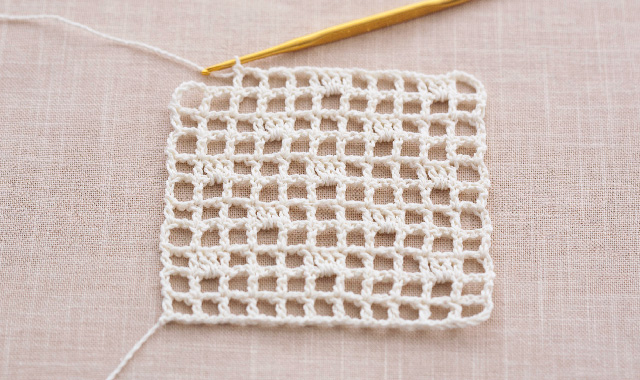
◇仕上げ
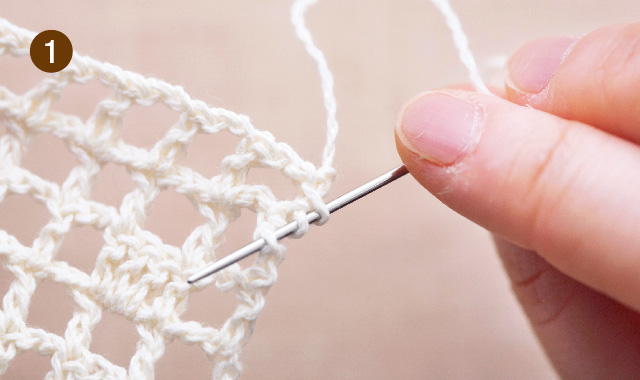
編み始めと終わりの糸始末をします。
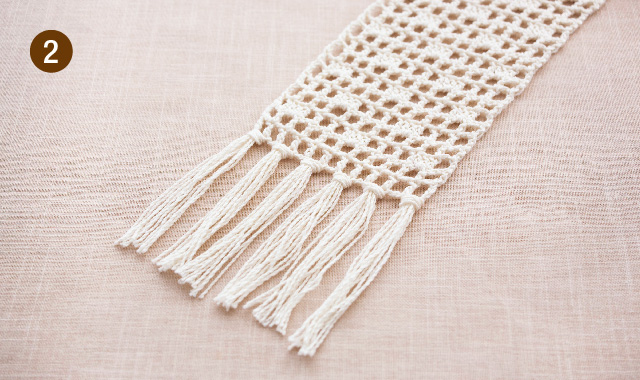
アイロンをあてて、フリンジを付けて仕上げます。
方眼編みがかわいい、ストールが完成しました♪

さらりと首にまいて、アクセサリーっぽく着けてみても素敵ですよ♪
おしゃれだけど簡単な方眼編み
方眼編みは一見手が込んでいそうに見えますが、実は単純な作業の繰り返し。難易度は高くないので、編み物初心者さんでも楽しんで作ることができますよ!
クチュリエブログでは、ほかにも基本的な裁縫の手順や少し凝った刺しゅうなど、たくさんのお役立ち情報を掲載しています。手づくりキットを販売しているクチュリエショップや、公式SNSアカウントもお見逃しなく!

本記事で紹介した商品はこちら

【月々¥100】「クチュリエクラブ」会員募集
「クチュリエクラブ」の会員になると、手づくり情報満載の会員誌『クチュリエの種』のお届けや、特別キャンペーンのご案内、手づくりイベントへの招待など、特典もいろいろ。
SHARE


関連記事

![最新カタログ『Couturier[クチュリエ] 2015年春夏号』の表紙の秘話を公開](https://www.felissimo.co.jp/couturier/blog/wp-content/uploads/2015/04/20150410_01_2.jpg)
最近読んだ記事


手芸(ハンドメイド)したくなったら、
クチュリエショップへ


ショッピング

おすすめコンテンツ
手芸・手づくりキット、ハンドメイド雑貨のお買い物はこちら

お買い物
編み物
毎日編みたい 年中編みたい編み物
お買い物
刺しゅう
刺したい刺繍(刺しゅう)がきっとある!

お買い物
刺し子
伝統模様からキャラクターまで人気の刺し子

お買い物
裁縫・ソーイング
裁縫・ソーイングのお悩みやコツが集結

お買い物
アクセサリー
ハンドメイドの手作りアクセサリー

お買い物
クラフト
クラフト 針糸使わないハンドクラフト

お買い物
ミニチュア
小さい かわいい 心ときめくミニチュア

お買い物
初心者キット
できるようになる!人気の初心者キット

お買い物
クチュリエ ショップサイト

お買い物
セール・キャンペーン

お買い物
最新カタログ無料プレゼント!

お買い物